Configuring the Network
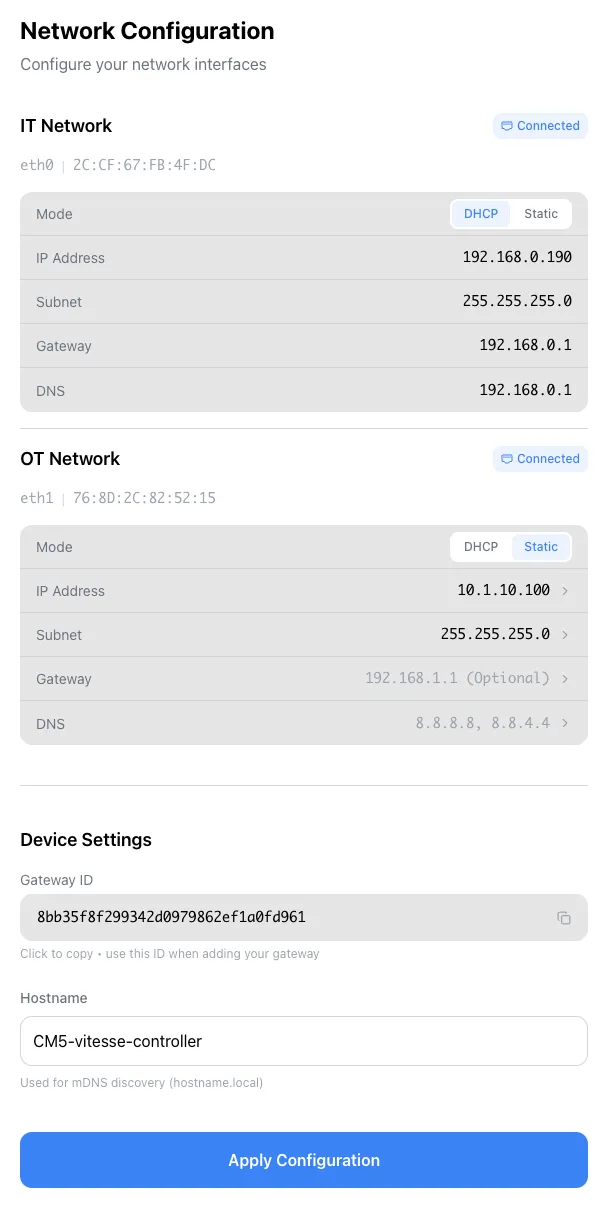
The setup portal shows Network Configuration with two network interfaces and device settings.
The Two Networks
Section titled “The Two Networks”The Relay has two separate Ethernet ports for security and isolation:
IT Network (eth0)
Section titled “IT Network (eth0)”Your office/internet-facing network. This is how the Relay talks to app.vitesse.dev.
- Mode:
DHCP(automatic) orStatic(manual IP) - If Static: set the IP Address, Subnet, Gateway, and DNS
- Once connected, you’ll see Connected next to eth0
OT Network (eth1)
Section titled “OT Network (eth1)”Your factory/automation network - where your PLCs live.
- Mode:
DHCPorStatic - Configure this to match your automation network
- Once connected, you’ll see Connected next to eth1
Device Settings
Section titled “Device Settings”Relay ID
Section titled “Relay ID”A unique identifier for your Relay. You’ll need this later to claim the Relay in app.vitesse.dev.
Click the copy icon to copy it to your clipboard.
Hostname
Section titled “Hostname”Used for local network discovery (e.g., hostname.local). Leave the default or set something memorable like factory-floor-relay-1.
Apply Your Changes
Section titled “Apply Your Changes”Click Apply Configuration when done. The Relay will save the settings and reconnect.
Checking the Connection
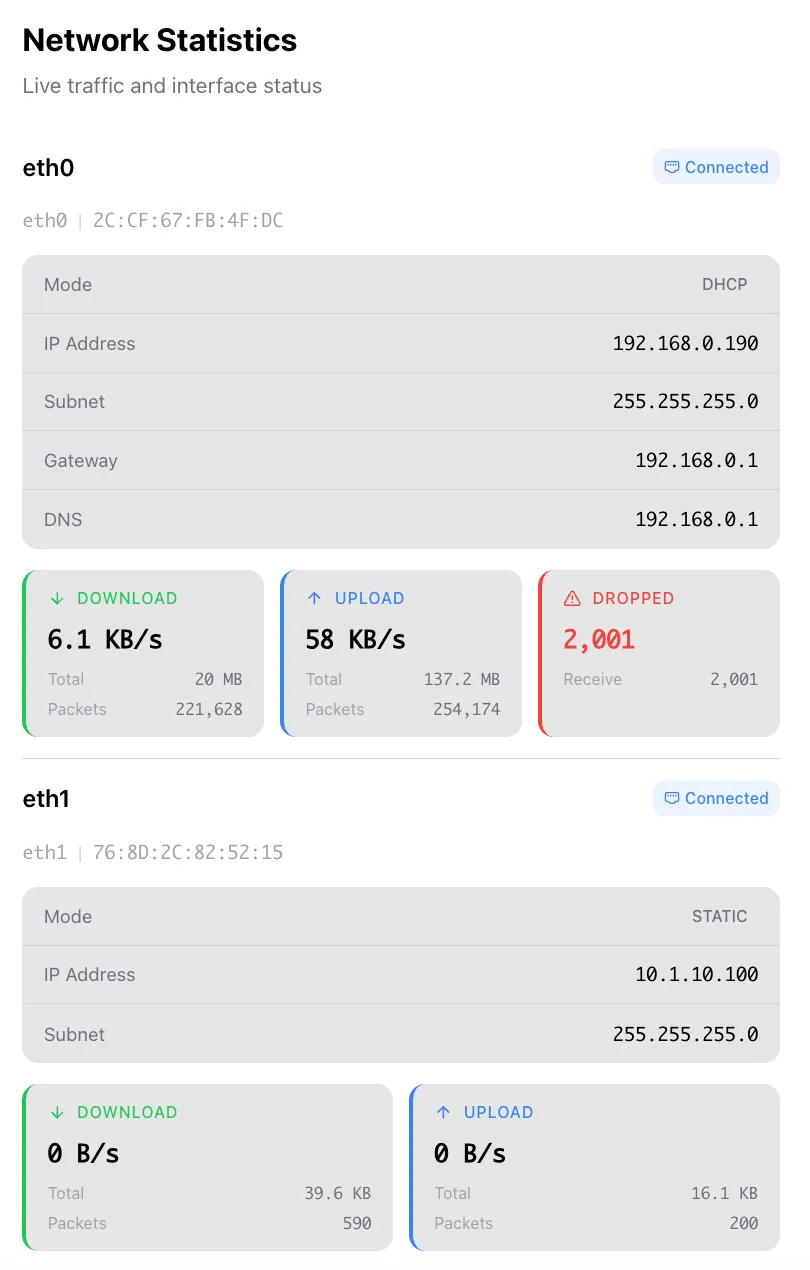
Section titled “Checking the Connection”After applying, switch to the Network Statistics page to verify both networks are online.
Look for:
- Connected badge on both eth0 and eth1
- Download/Upload speeds showing live traffic
- Dropped packets should be low - high drops suggest a network issue
Next: Back up your configuration.